Oracle Cloud Installer
On this page, we explain step by step how to install CloudPanel on Oracle Cloud.
Create a Virtual Cloud Network
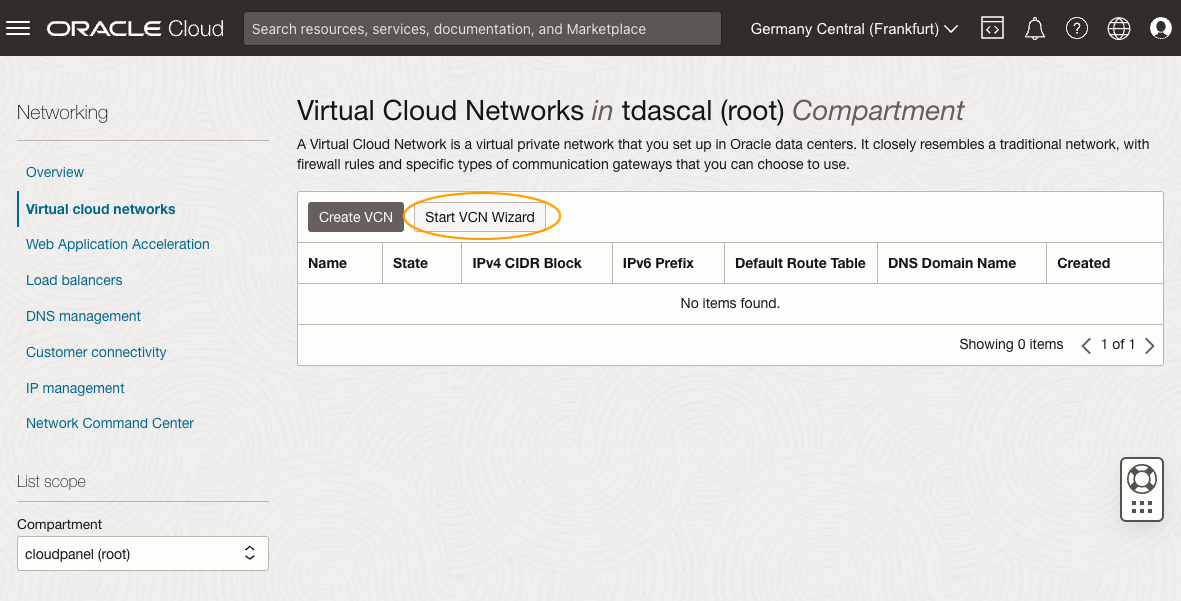
- Go to Virtual Cloud Networks and click on Start VNC Wizard.
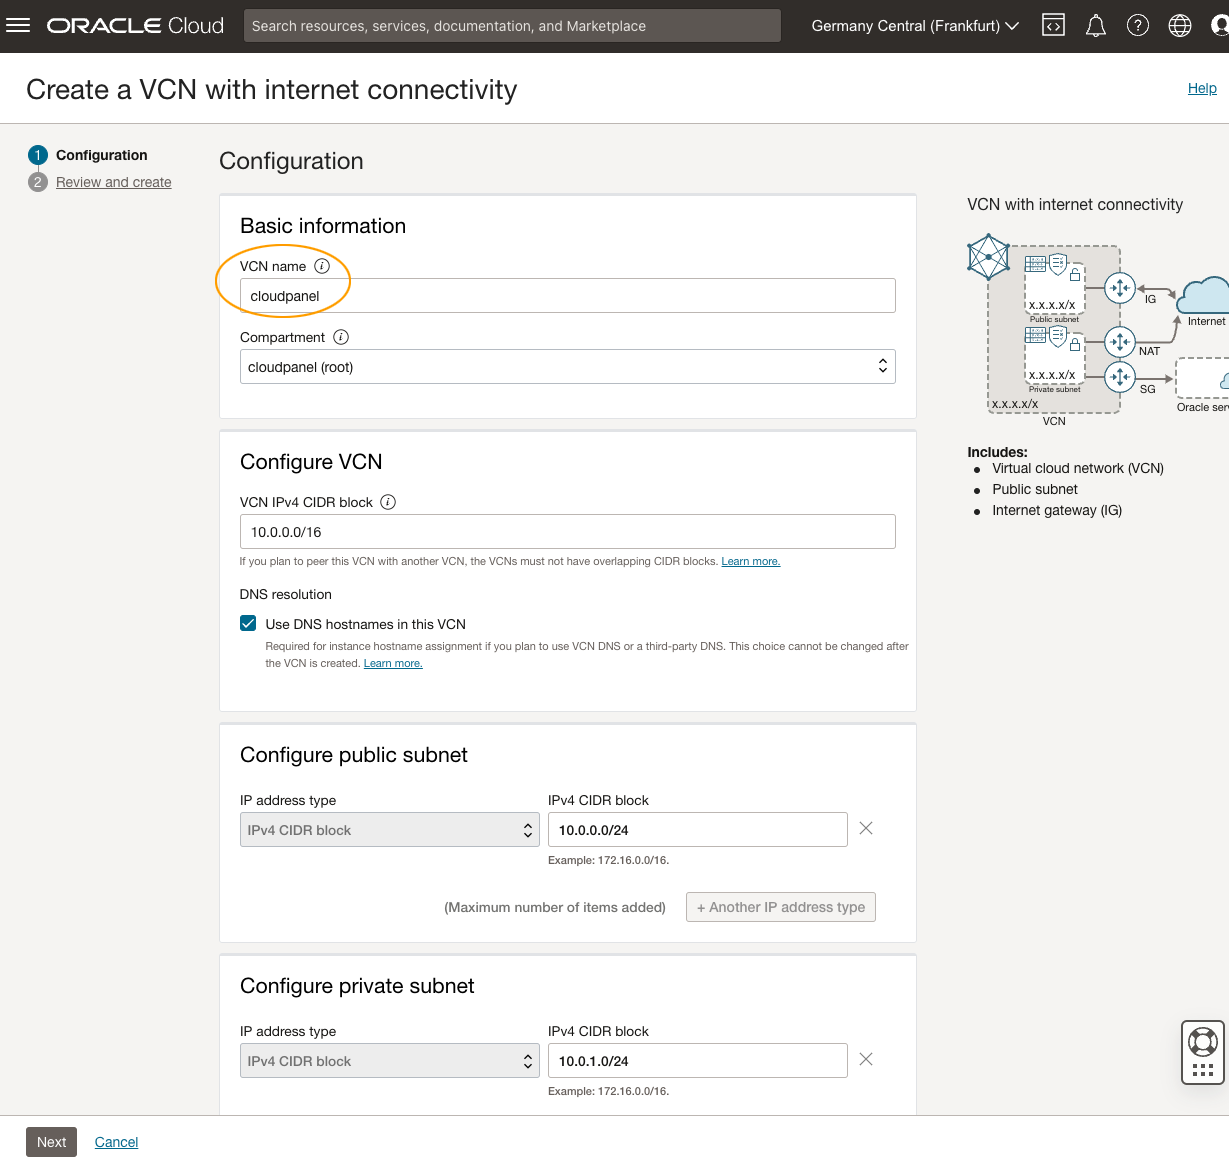
- Enter a VCN Name and click on the button Next bottom left.
- Review and click on Create.
Firewall Configuration
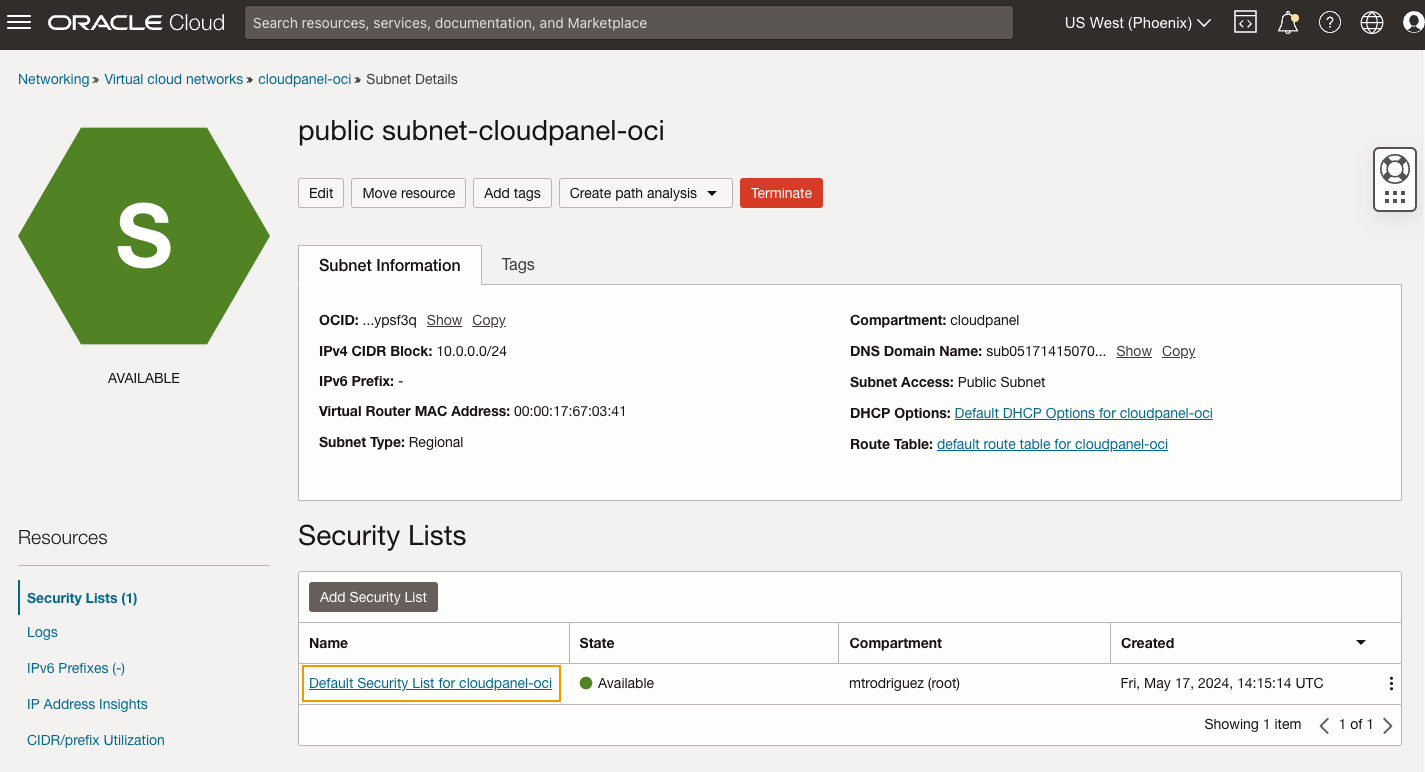
- Click on your created VCN, and then click on the public subnet.
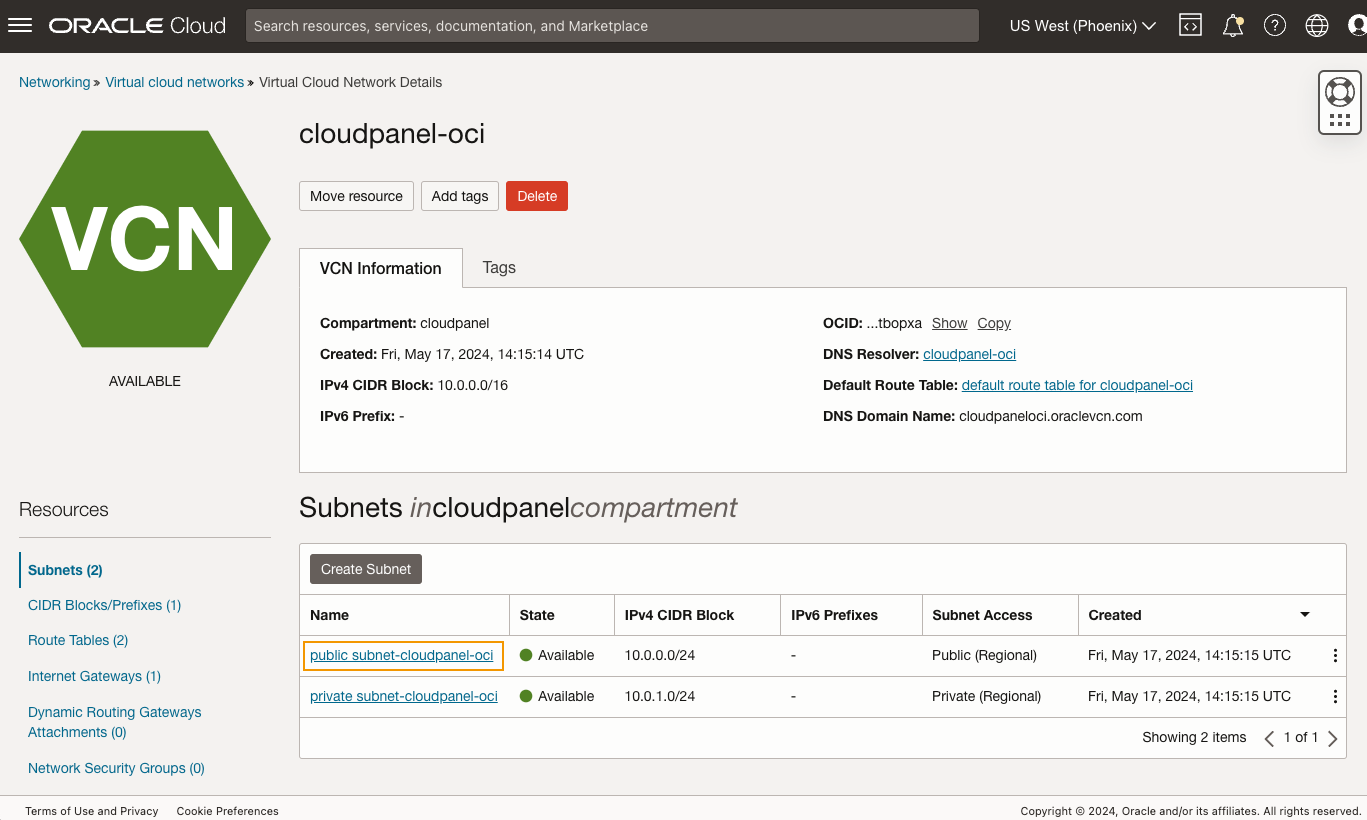
- Click on Default Security List for cloudpanel for whitelisting ports.
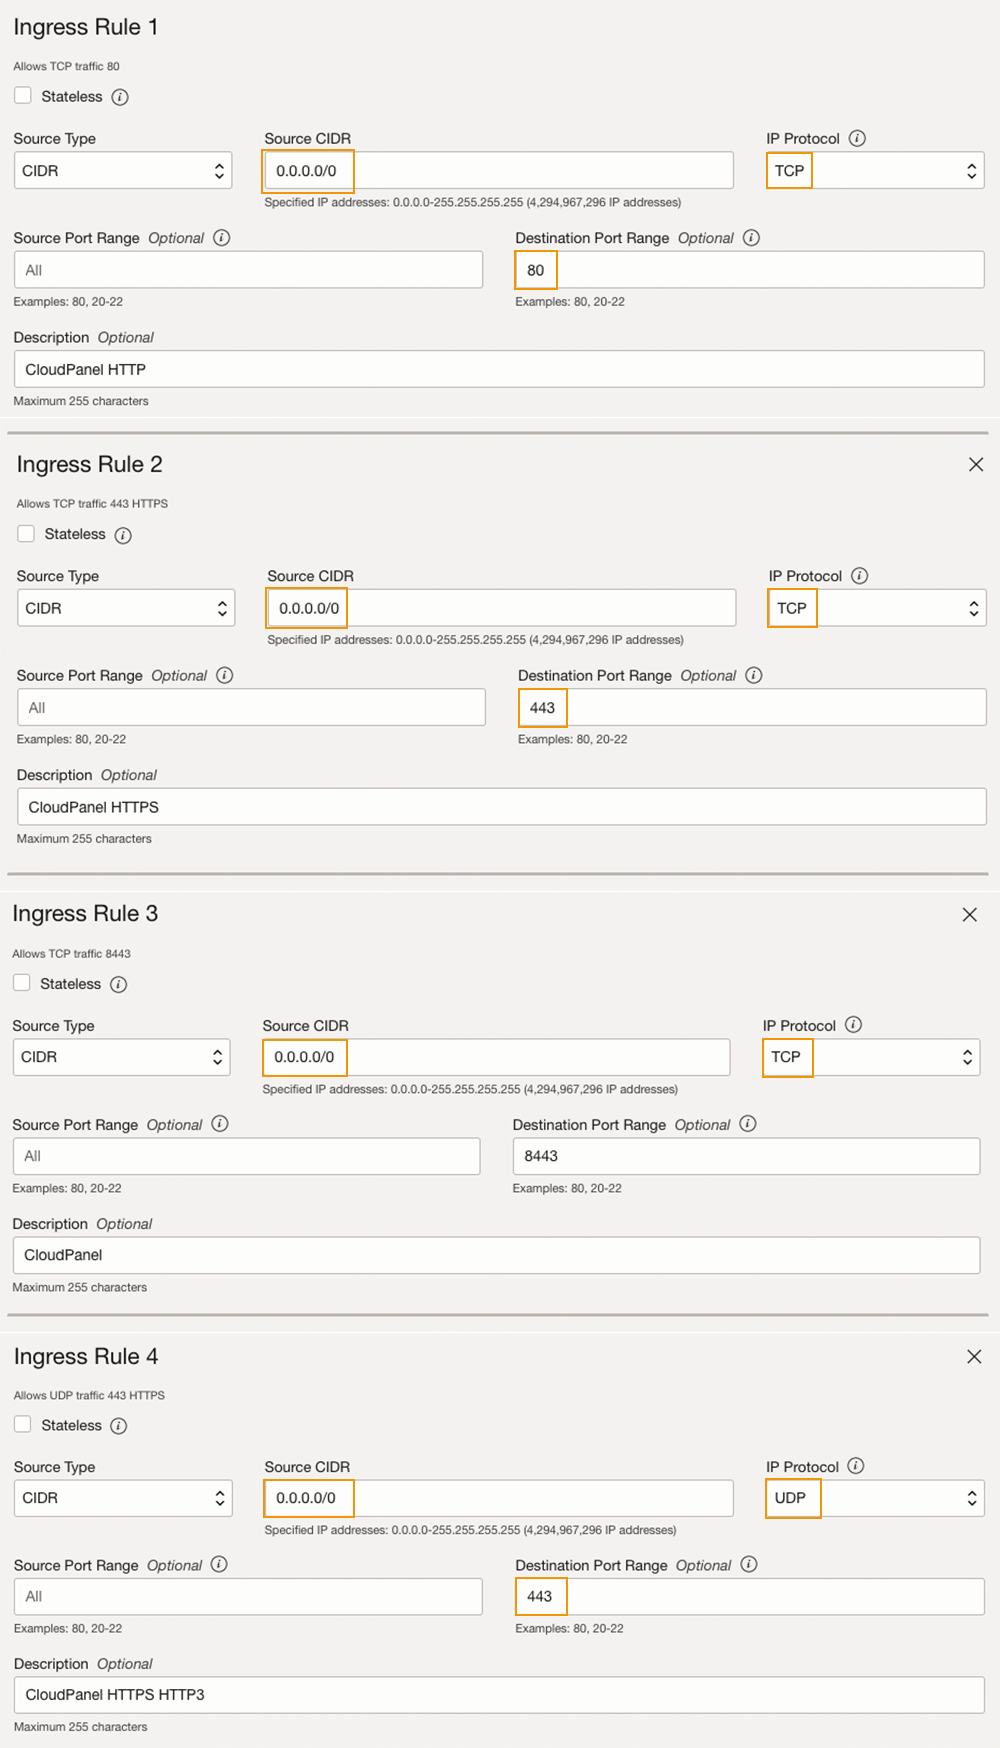
- Click on Add Ingress Rules and create a rule for 80, 443, and 8443.
Create Instance
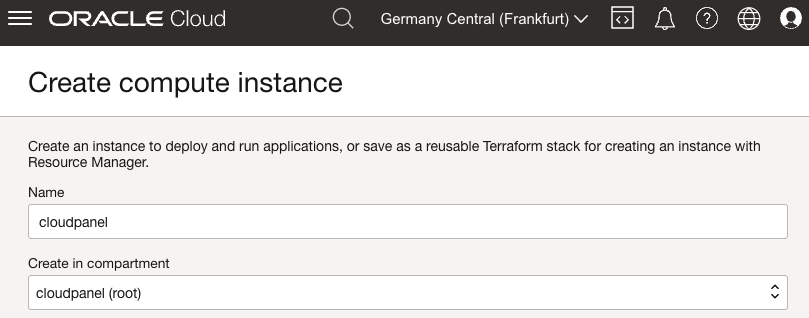
Go to Instances and click on the button Create Instance.
Enter the Name of the Instance and select the compartment.
Placement
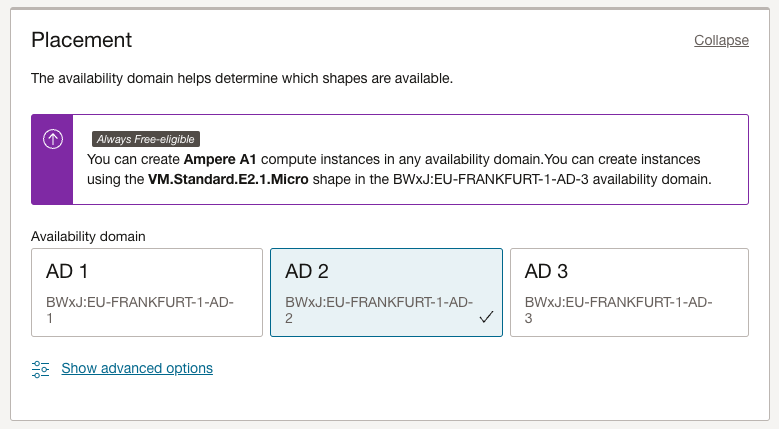
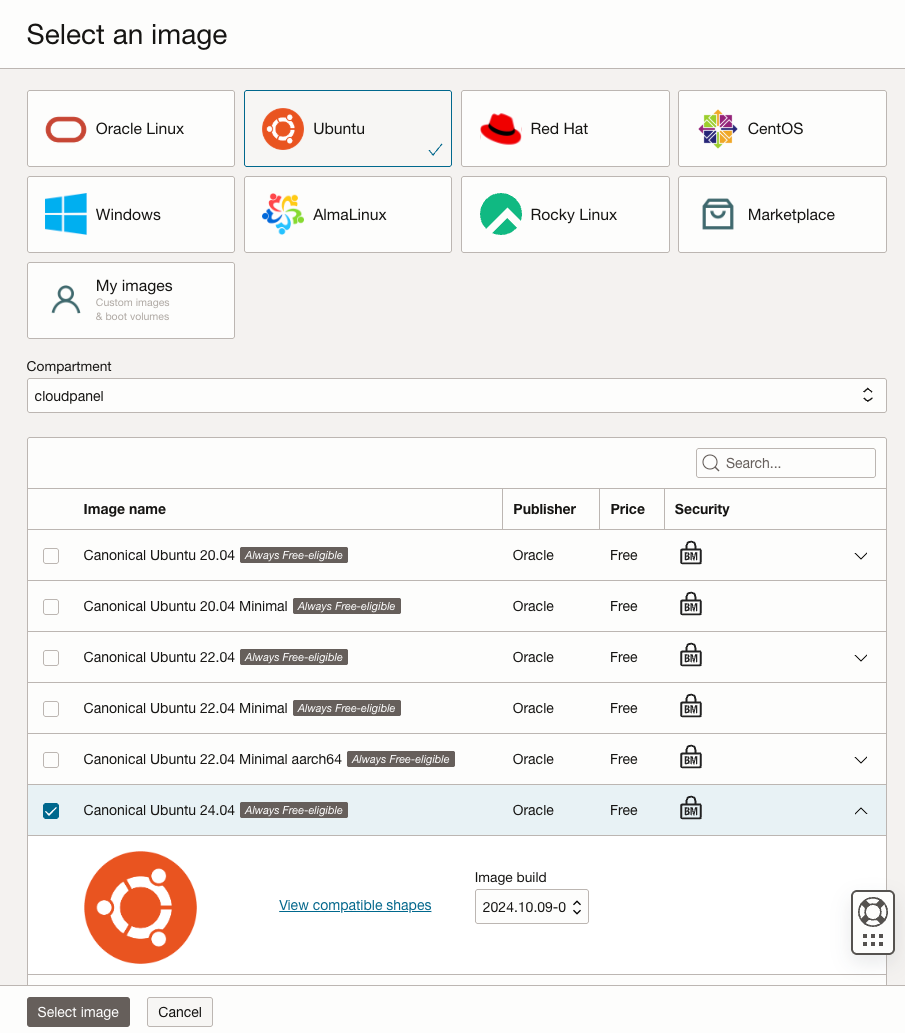
Image and Shape
Change the image to Ubuntu 24.04 or Debian 12 and select your Shape.
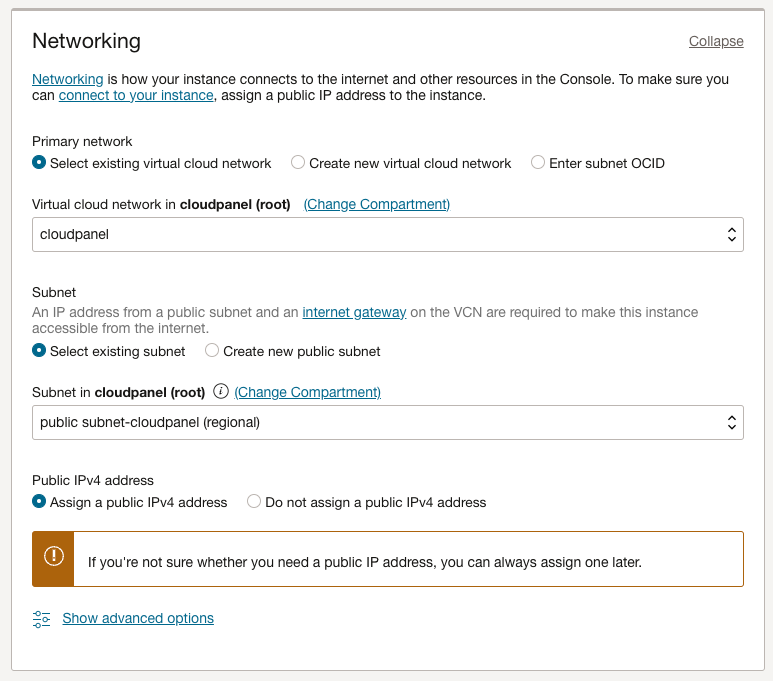
Networking
Select your created Virtual Cloud Network and select the public subnet.
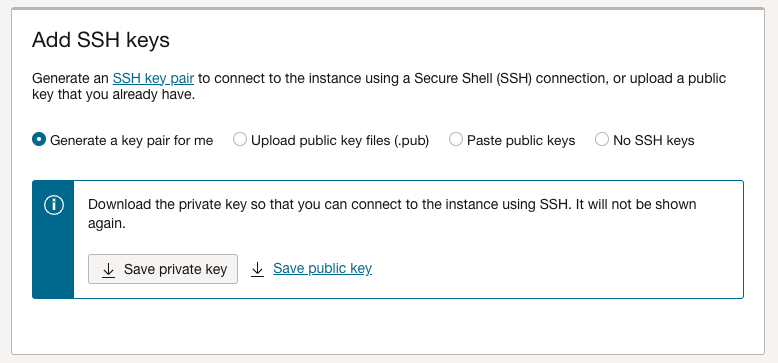
SSH Keys
Upload your SSH Keys or generate a new key pair.
Provision Instance
Click on Create to provision the instance, it may take some minutes.
Install CloudPanel
After launching the Instance, log in with SSH and run the installer script.
- Ubuntu 24.04 LTS
- Ubuntu 22.04 LTS
- Debian 12 LTS
- Debian 11 LTS
- Login via SSH to the Instance.
ssh -i path_to_your_private_key ubuntu@serverIpAddress
- Switch from the user ubuntu to root:
sudo su root
- Update the system and install the required packages.
apt update && apt -y upgrade && apt -y install curl wget sudo cron
- Run the installer with your preferred Database Engine.
- MySQL 8.4
- MySQL 8.0
- MariaDB 11.4
- MariaDB 10.11
curl -sS https://installer.cloudpanel.io/ce/v2/install.sh -o install.sh; \
echo "19cfa702e7936a79e47812ff57d9859175ea902c62a68b2c15ccd1ebaf36caeb install.sh" | \
sha256sum -c && sudo CLOUD=oci DB_ENGINE=MYSQL_8.4 bash install.sh
curl -sS https://installer.cloudpanel.io/ce/v2/install.sh -o install.sh; \
echo "19cfa702e7936a79e47812ff57d9859175ea902c62a68b2c15ccd1ebaf36caeb install.sh" | \
sha256sum -c && sudo CLOUD=oci DB_ENGINE=MYSQL_8.0 bash install.sh
curl -sS https://installer.cloudpanel.io/ce/v2/install.sh -o install.sh; \
echo "19cfa702e7936a79e47812ff57d9859175ea902c62a68b2c15ccd1ebaf36caeb install.sh" | \
sha256sum -c && sudo CLOUD=oci DB_ENGINE=MARIADB_11.4 bash install.sh
curl -sS https://installer.cloudpanel.io/ce/v2/install.sh -o install.sh; \
echo "19cfa702e7936a79e47812ff57d9859175ea902c62a68b2c15ccd1ebaf36caeb install.sh" | \
sha256sum -c && sudo CLOUD=oci DB_ENGINE=MARIADB_10.11 bash install.sh
- Login via SSH to the Instance.
ssh -i path_to_your_private_key ubuntu@serverIpAddress
- Switch from the user ubuntu to root:
sudo su root
- Update the system and install the required packages.
apt update && apt -y upgrade && apt -y install curl wget sudo cron
- Run the installer with your preferred Database Engine.
- MySQL 8.0
- MariaDB 11.4
- MariaDB 10.11
- MariaDB 10.6
curl -sS https://installer.cloudpanel.io/ce/v2/install.sh -o install.sh; \
echo "19cfa702e7936a79e47812ff57d9859175ea902c62a68b2c15ccd1ebaf36caeb install.sh" | \
sha256sum -c && sudo CLOUD=oci DB_ENGINE=MYSQL_8.0 bash install.sh
curl -sS https://installer.cloudpanel.io/ce/v2/install.sh -o install.sh; \
echo "19cfa702e7936a79e47812ff57d9859175ea902c62a68b2c15ccd1ebaf36caeb install.sh" | \
sha256sum -c && sudo CLOUD=oci DB_ENGINE=MARIADB_11.4 bash install.sh
curl -sS https://installer.cloudpanel.io/ce/v2/install.sh -o install.sh; \
echo "19cfa702e7936a79e47812ff57d9859175ea902c62a68b2c15ccd1ebaf36caeb install.sh" | \
sha256sum -c && sudo CLOUD=oci DB_ENGINE=MARIADB_10.11 bash install.sh
curl -sS https://installer.cloudpanel.io/ce/v2/install.sh -o install.sh; \
echo "19cfa702e7936a79e47812ff57d9859175ea902c62a68b2c15ccd1ebaf36caeb install.sh" | \
sha256sum -c && sudo CLOUD=oci DB_ENGINE=MARIADB_10.6 bash install.sh
Not yet supported by the Oracle Cloud.
Not yet supported by the Oracle Cloud.
Access CloudPanel
Security
For security reasons, access CloudPanel as fast as possible to create the admin user. There is a small time window where bots can create the user. It's highly recommended to open port 8443 only for your IP.
Reboot the Instance, and after booting, you can now access CloudPanel via Browser: https://publicIpAddress:8443
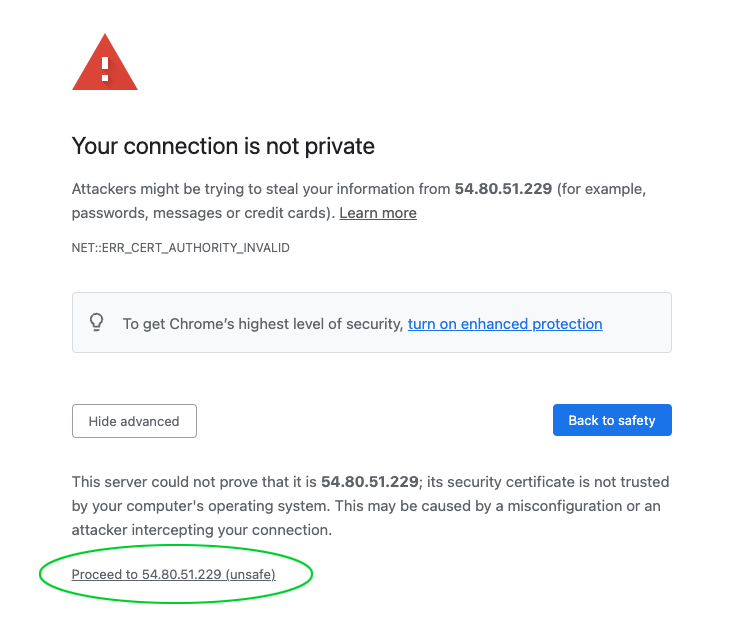
Ignore the self-signed certificate warning and click on Advanced and Proceed to continue to CloudPanel.
