WordPress 5
CloudPanel v1 is obsolete
CloudPanel v1 is obsolete; check out the CloudPanel v2 Docs.
On this page, we explain step by step how to setup WordPress 5 with CloudPanel.
Installation
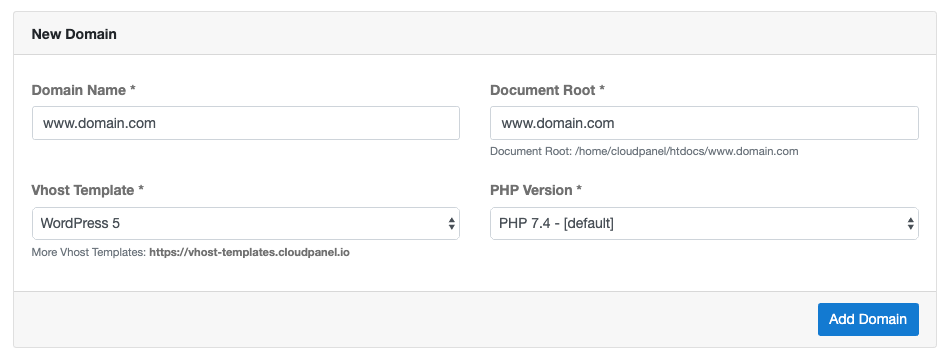
In the following example we will setup WordPress under the domain www.domain.com.
Preparation
Before we can start with the installation, we need to create an SSH User, a Database, and a Domain.
When you Add the Domain, make sure to select the WordPress 5 Vhost Template and the right PHP Version.
Installation
To install WordPress do the following steps:
- Login via SSH to the server e.g. with john-ssh and go to the users tmp directory:
cd ~/tmp
- Download and extract the latest WordPress 5 version.
curl -sL https://wordpress.org/latest.tar.gz | tar xfz -
- Move files to the htdocs directory of the domain:
cp -R wordpress/* /home/cloudpanel/htdocs/www.domain.com/
- Reset permissions.
cd /home/cloudpanel/htdocs/
clpctl system:permissions:reset www.domain.com 775
- Clean up the tmp directory.
rm -rf ~/tmp/*
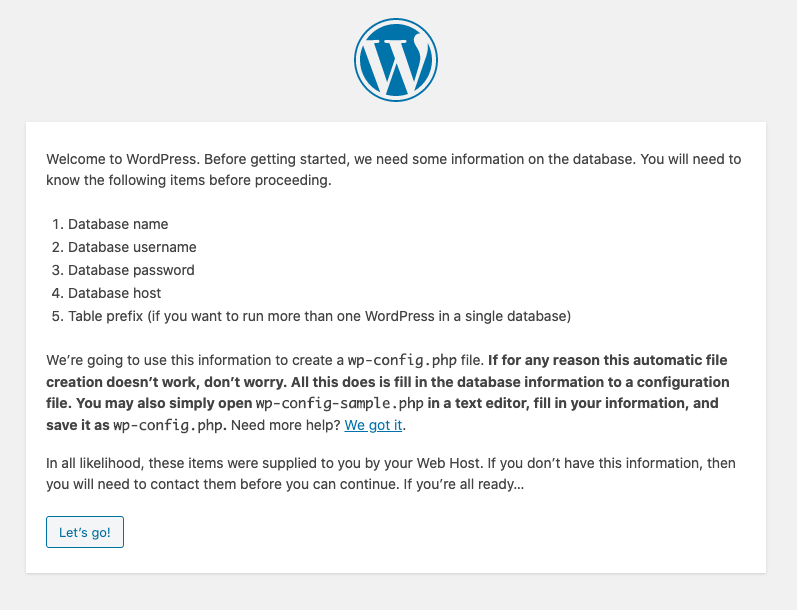
- Open your domain in the browser and go through the Installation Wizard.
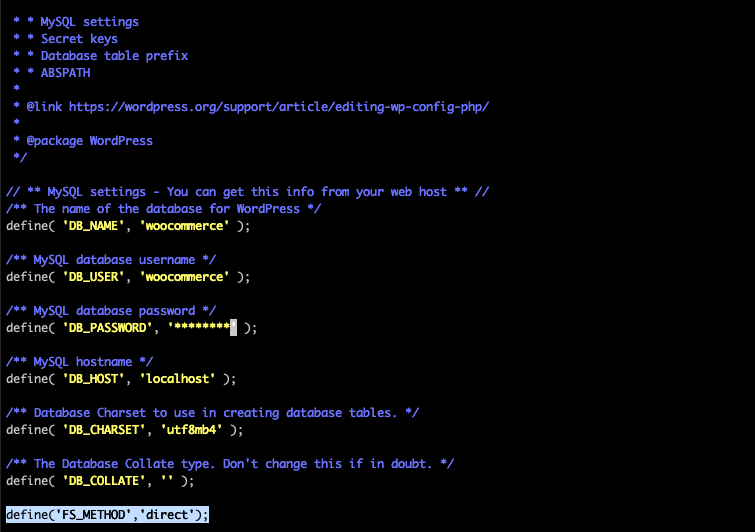
- Open the WordPress configuration file wp-config.php.
nano /home/cloudpanel/htdocs/www.domain.com/wp-config.php
Add the following line after the other constants to download all plugins and themes to the disk.
define('FS_METHOD','direct');
- Done!